My knowledge of Japanese textiles is very limited. No, let’s be honest… it’s pretty much non-existent. However I have always been drawn to the simplicity of Sashiko stitching although until recently I remained totally confused between Sashiko and Boro, not knowing whether they are the same thing or totally different. So a bit of research was required.
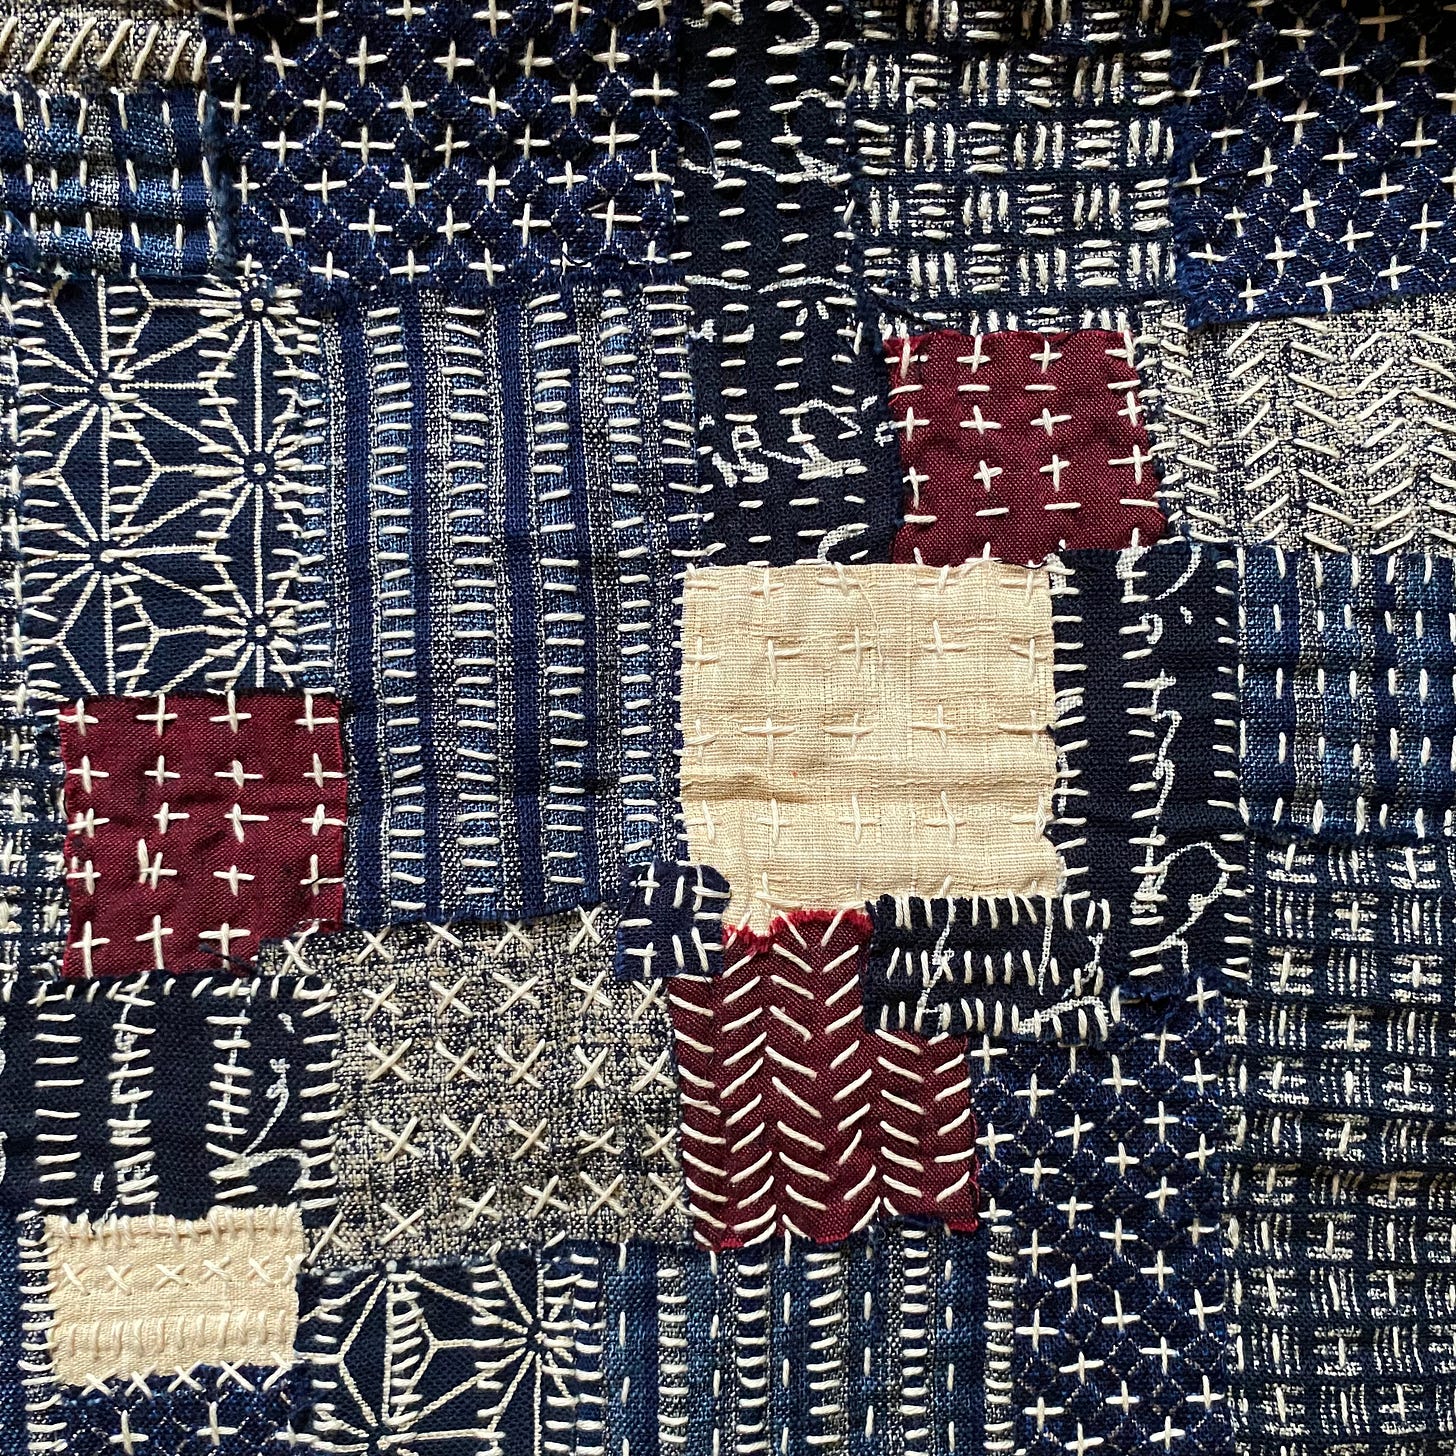
Sashiko refers to the actual stitch which roughly translates as ‘little stabs’ whereas Boro meaning ‘rags’ refers to the cloth produced. Boro or Boromono cloth is made by the repeated mending and patching of fabric which is a practice that was born out of the necessity of economic hardship in Northern Japan over 400 years ago. Central to the concept of Boro is finding beauty in mending and not wasting anything, although traditionally very little aesthetic consideration was given to the neatness or beauty of the stitching. It was a practical solution to clothing families and keeping them warm. The many layers of cloth stitched together with repeated lines of running stitch created a warm fabric that trapped air between the layers. Winters were harsh and cold in Northern Japan plus people were poor. They produced their own cloth from woven hemp which they dyed with indigo as it was cheap and easily grown. Worn out clothes would be patched and pieced together with simple running stitches, traditionally in white cotton thread, which made the garments more durable and kept them in use for longer. The stitching was used to reinforce already patched clothing as well as adding new patches which increased the strength and warmth of the fabric. Although the stitches are essentially just a running stitch, common to hand crafted folk embroidery and textiles throughout the world, they are often combined together in ways which make highly decorative patterns, known to us as Sashiko.
However this type of mending is process driven rather than focussed on the finished results. The primary goal was to extend the life of the garments, strengthening the fabric. Each garment would go through repeated wear and repair cycles, slowly acquiring a beauty that was never planned. Stitches are often wonky and uneven, but it is imperfection that is characteristic of Boro cloth. These old mended utilitarian clothes are now considered an art form and there have been gallery exhibitions of these antique Boro items often showing multiple layers of patches and stitches on a single garment. I can only imagine the astonishment of the Japanese farmers and fishermen centuries ago if they knew that their old, mended work jackets would end up on gallery walls.
The fact that they have been treasured over the years is central to the Japanese aesthetic of Wabi Sabi. It is apparently a difficult concept to translate but my understanding is that it is an awareness and acceptance of the transient nature and imperfection of things, recognising items as being beautiful and unique, despite their flaws, irregularities and impermanence. There is value and beauty in the history and story of our possessions.
My first experience of Sashiko stitching was from a kit, designed to teach me how to master this type of Japanese stitch, except it didn’t really teach me anything. The kit came with a printed design on indigo dyed cotton and all I had to do was follow the design with the supplied needle and thick cotton thread. The result was an attractive Sashiko clam shell design on a 12” square of quilted fabric that was added to my ever growing pile of samples with no other purpose than to clutter up my studio. I have considered turning it into a cushion or possibly an oddly shaped bag but as I need neither more cushions nor bags it has remained a sample. You would think I might learn something from that but no.
A couple of years ago with time on my hands at The Festival of Quilts I bought myself another kit to give myself something to do while I sat between classes. This time it was not quite so prescriptive and contained various different scraps of cotton fabric, mostly in shades of indigo plus needles and thread with some very loose instructions to layer scraps of fabric onto a base fabric until they looked pleasing and then stitch them down with running stitch. I layered mine as I went along rather than plan out my design from the start and varied my running stitches in an attempt to create patterns until I had covered my base cloth and I have to say I was pleased with the result. But the kit was intended to be a bag and as I have said I don’t need any more bags in my life so once again this piece of cloth has remained a sample. A rather attractive and tactile sample but pretty useless nevertheless.
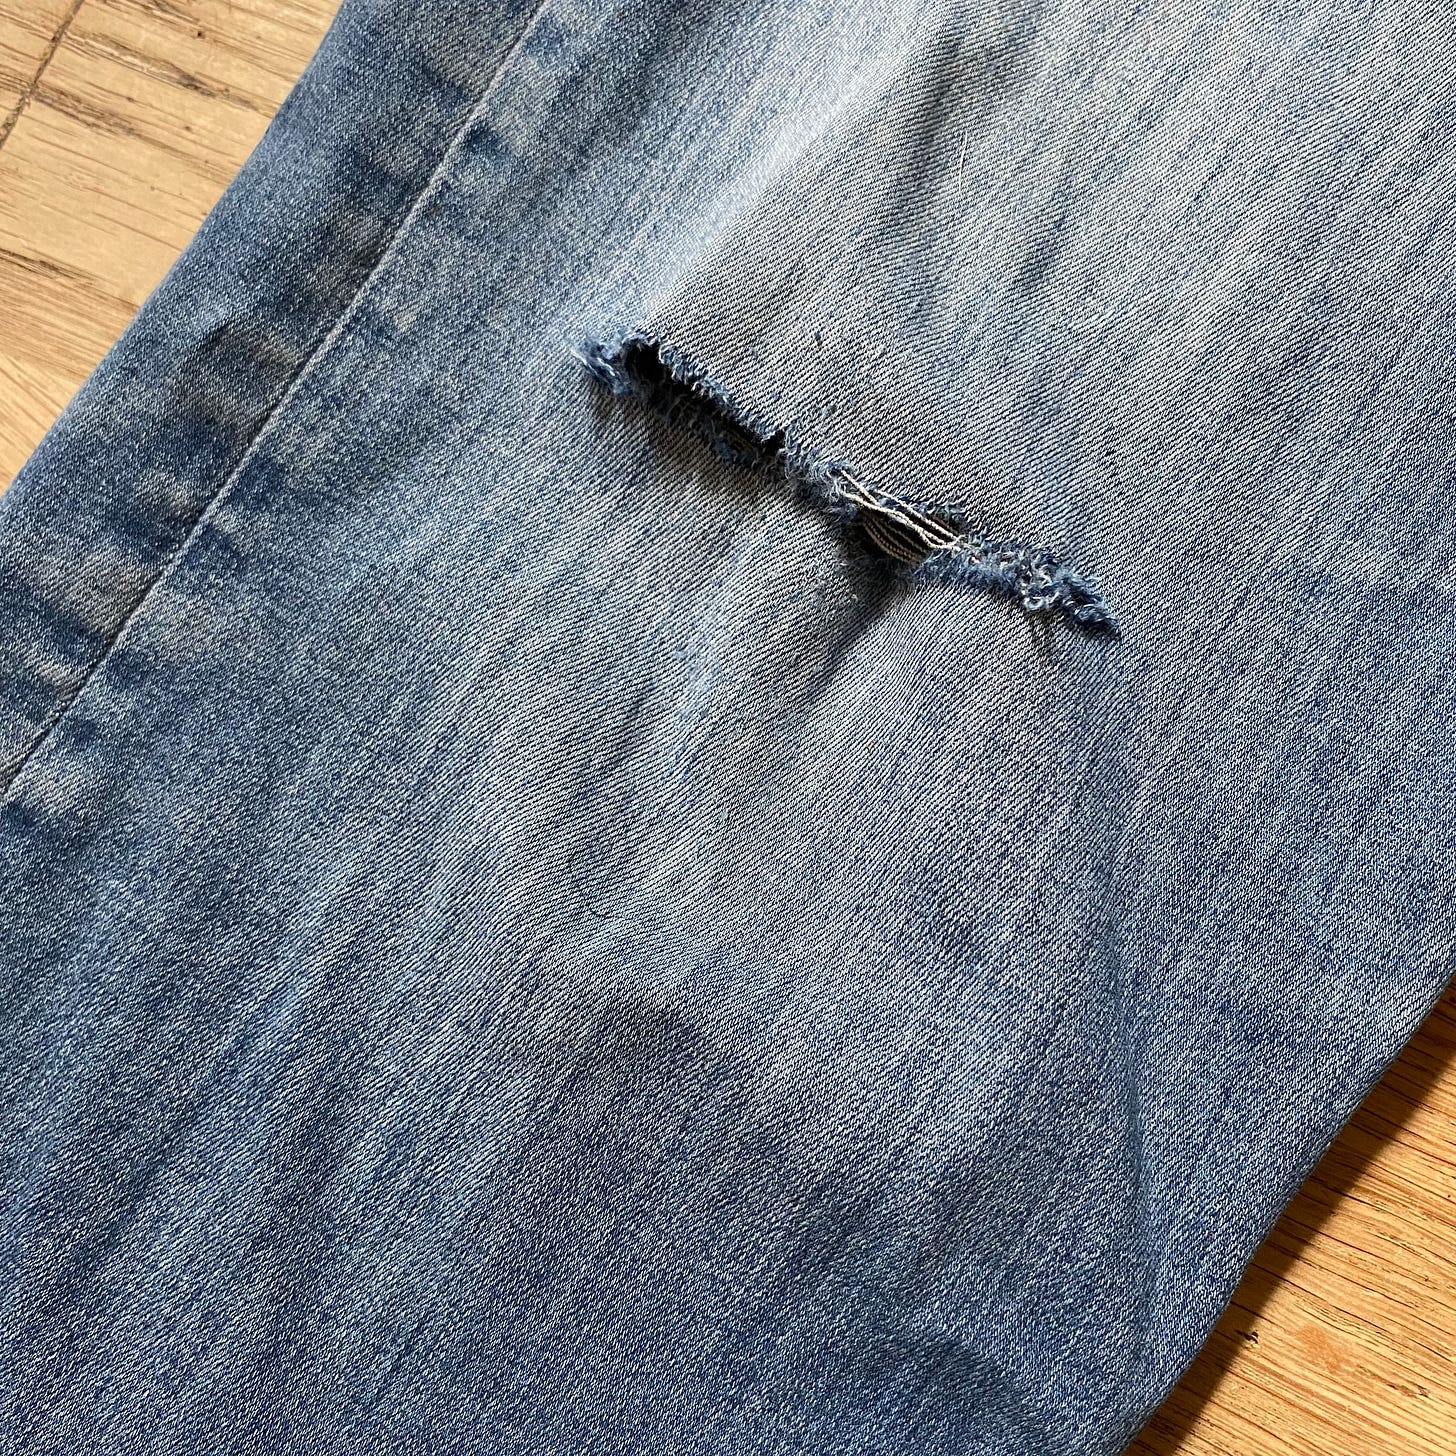
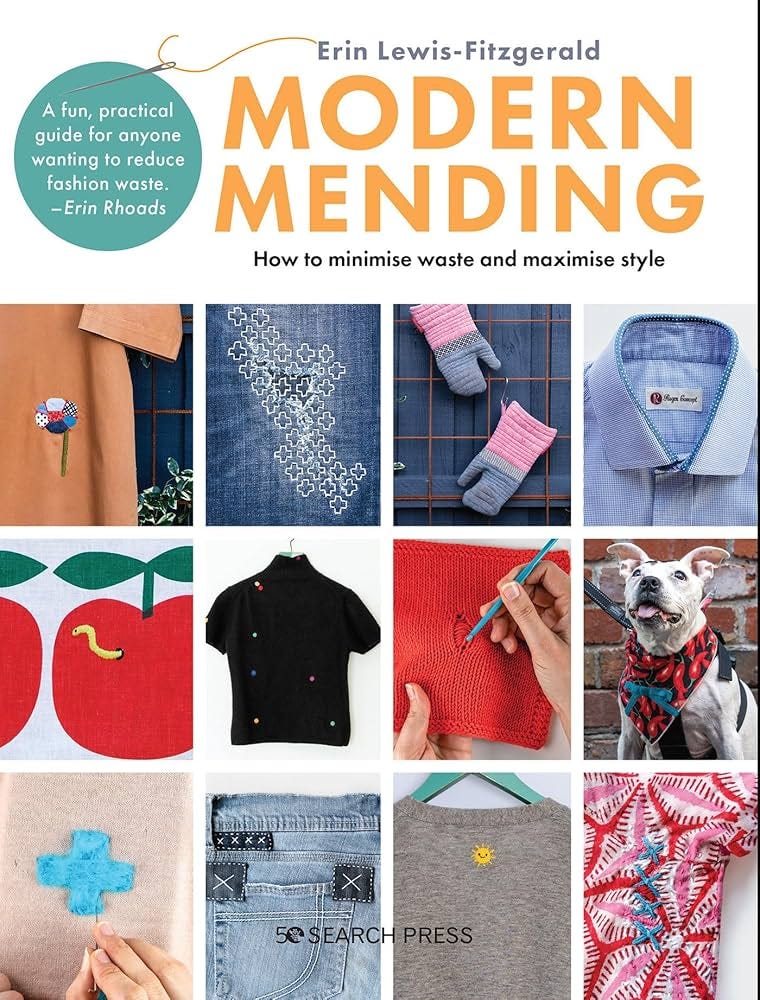
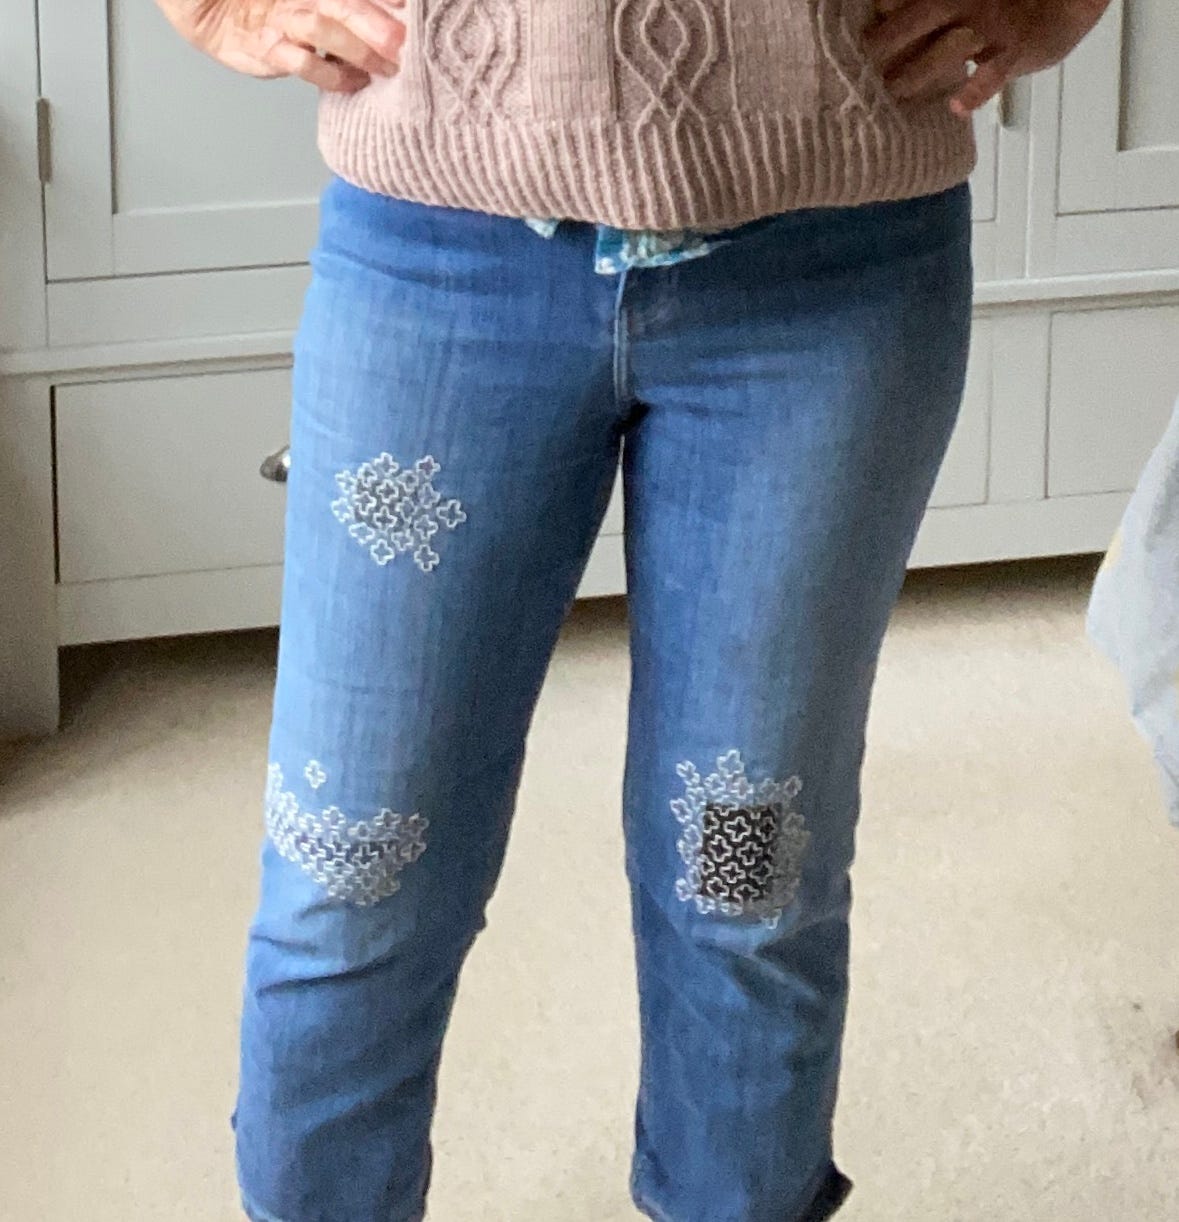
Roll forward another few years until last week when I stuck my foot through the knee of my cropped jeans. Now whilst ripped knees might be the height of fashion in some circles I wasn’t entirely sure I could carry off the look at my advanced age. I had already patched one small hole and they were starting to look thin after six or seven years of constant summer wear, but I am rather attached to them and so in the spirit of sustainability and keeping clothes out of landfill I decided to repair them. I have several books on visible mending, but I took inspiration from the fabulous ‘Modern Mending’ by Erin Lewis-Fitzgerald, a book filled with so many great mending ideas it makes you want to poke holes in your clothes… please don’t. Actually I lie, I didn’t only take inspiration I blatantly copied one of Erin’s repairs which was a pair of jeans with Sashiko stitching over the patched repair. (You can see the jeans in question on the front cover, top row second from the left, looking much neater than mine!)
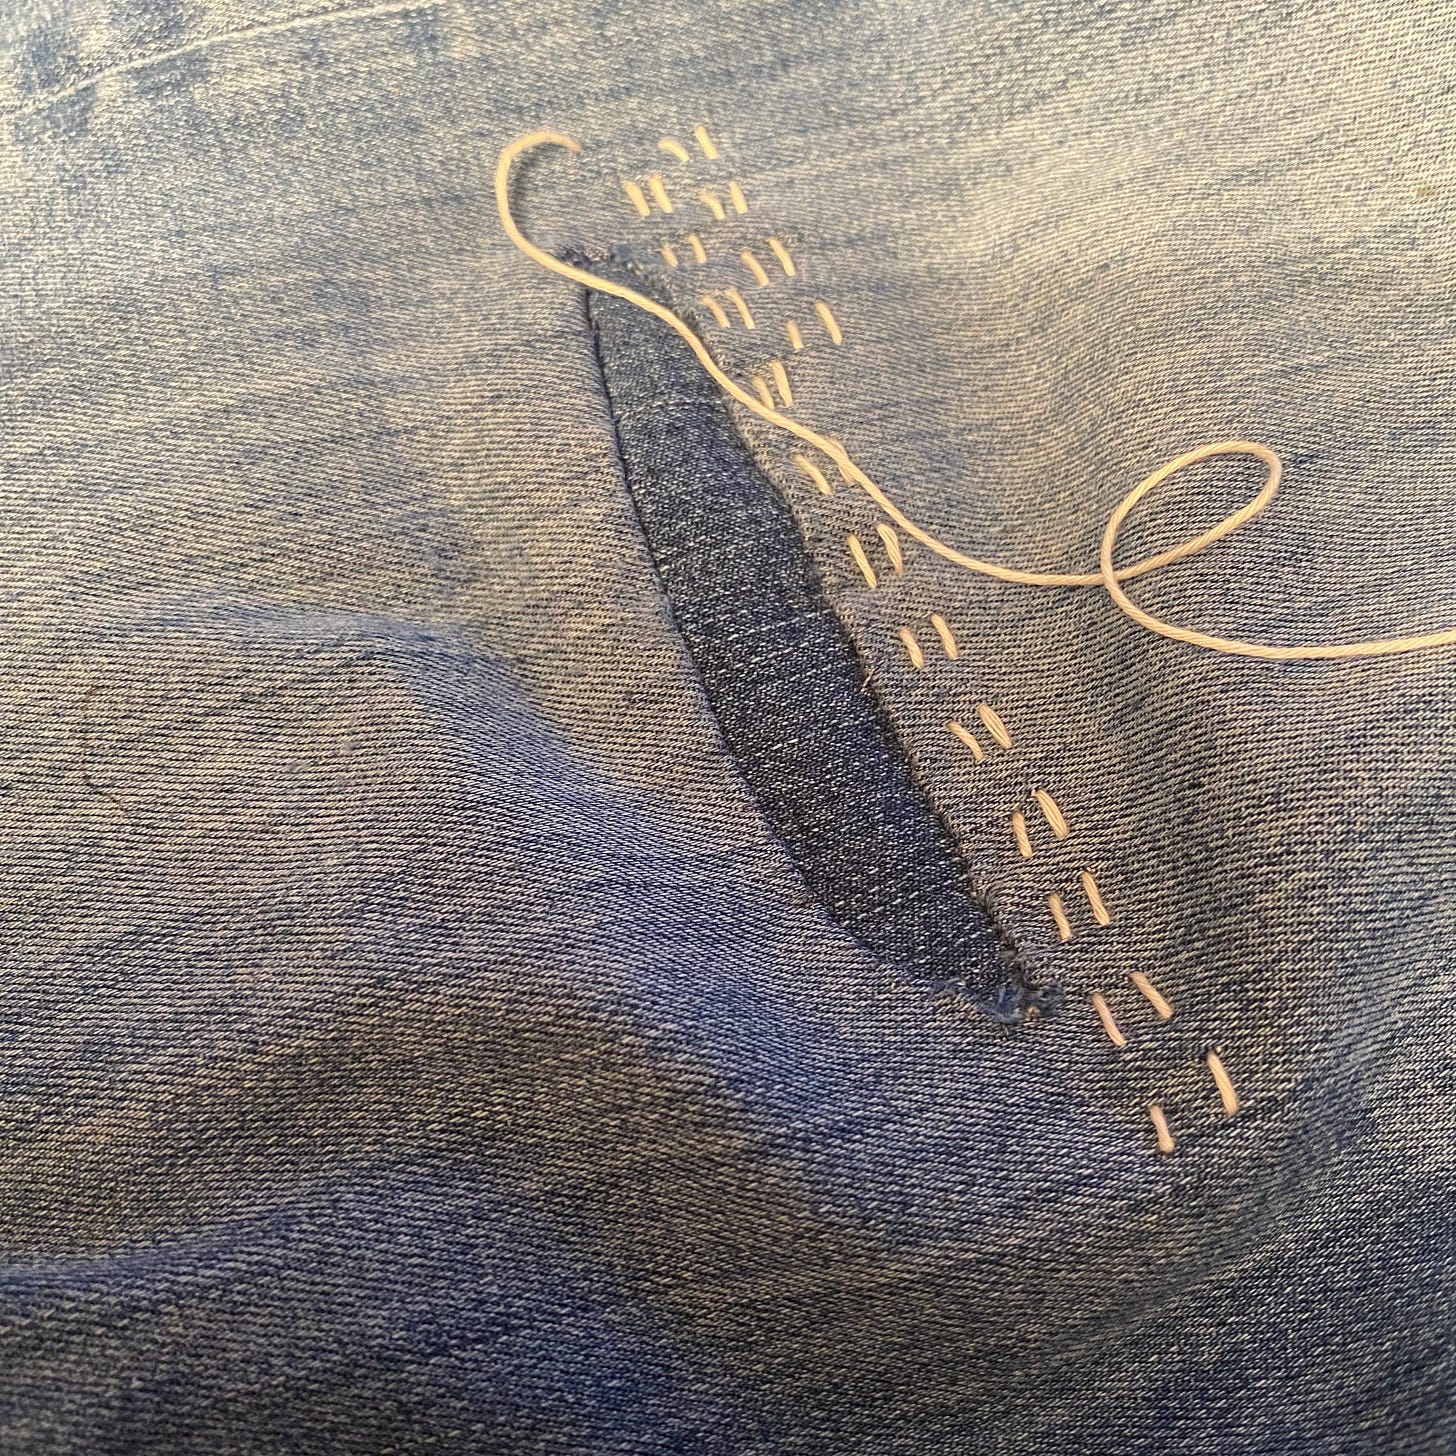
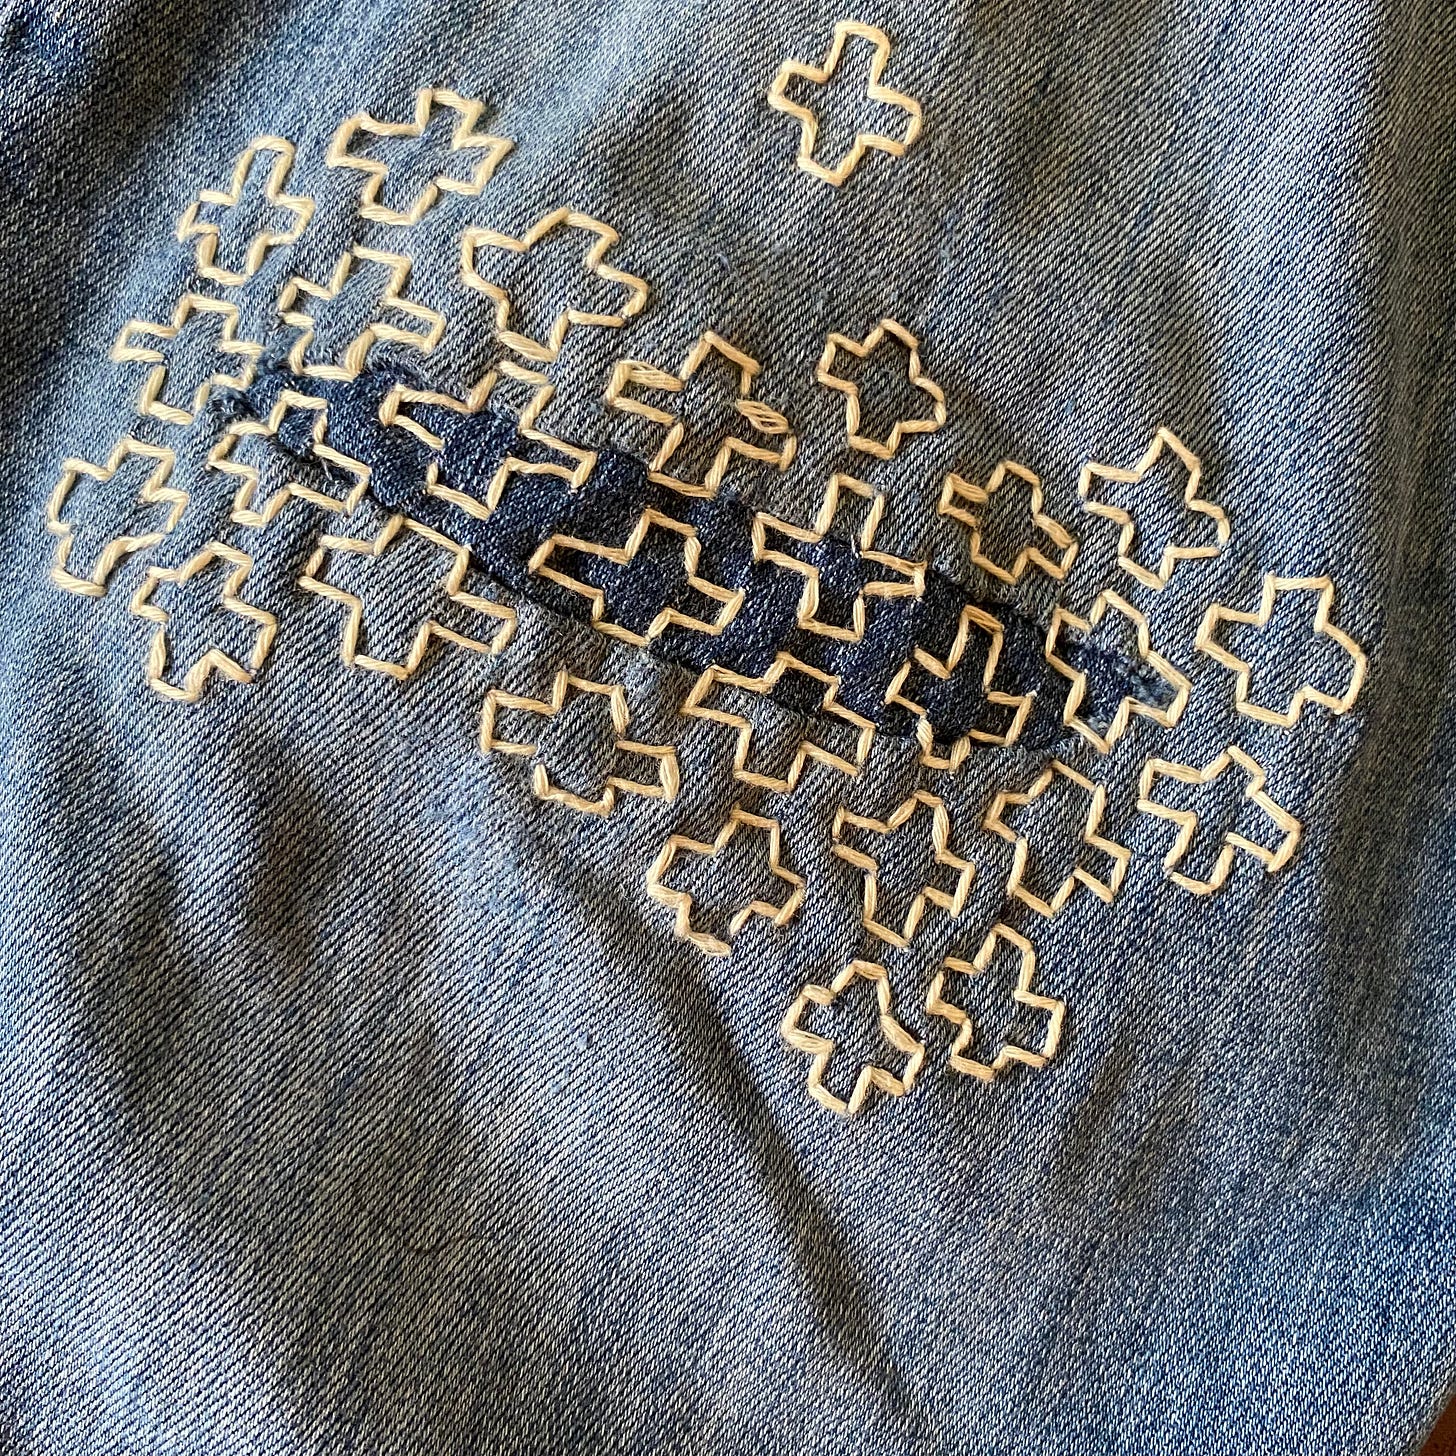
Before I started with the Sashiko, I patched the hole from behind with a scrap of spare denim so that the stitching would just serve to reinforce the repair. The chosen design involves little crosses, called jujizashi, which is very cleverly based on rows of running stitches that are first worked in one direction horizontally and then worked back vertically.
Erin advises that you use a grid to help align the stitches but then goes on to say how difficult it is to mark a grid onto patched denim. In the end she stitched over water soluble stabiliser, but it all sounded a bit of a faff in that it would mean me going out in the rain to my studio and actually finding some water soluble stabiliser. So I decided to wing it and go free style. I admit there was a bit of unpicking at the beginning when my parallel lines of running stitches were obviously far from being parallel, but I was quite happy embracing the imperfection of my very wonky crosses… in the spirit of Wabi Sabi and ancient Boro cloth.
And so pleased was I with my mended knee and the way that the Sashiko blends the original patch into the background fabric, that I added some more crosses over the original patch and then decided to put some stitching on the other leg too as a preventative measure given that the fabric was already looking a little thin.
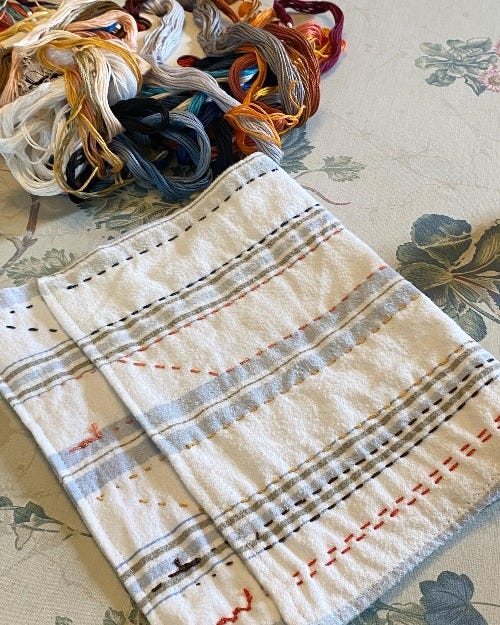
Of course now the weather has turned chilly here in the UK and I have no desire to have my ankles exposed in cropped jeans so they have been tucked away in a drawer until next year (the jeans not my ankles) while I wonder where else I can practise my Japanese inspired stitching. And then just like that I had an answer when reader Susan emailed me and mentioned she had been making zokin*, which are a Japanese cleaning cloth. The zokin are essentially made of old rags and scraps of absorbent recycled materials stitched together in layers with running stitches and are used for all manner of cleaning up ,reducing the need for disposable cleaning cloths, paper towels and wet wipes, all of which are environmentally unfriendly. And when they get dirty they can be bunged in the washing machine with the next load of towels. Japanese children actually go to school with their own stack of zokin for cleaning up, so they grow up using them. Sometimes we just need to change our mindset. I can see many zokin in gift parcels this year because as well as being a practical solution to cleaning spills and sticky fingers, making them will be a wonderful portable and meditative project for the autumn.
I haven’t made any zokin yet but found this photo of a beautiful example from the blog Fig Jam and Lime Cordial, to give credit where it’s due.
If you would like to make your own zokin, there are no rules really as you can do what works for you but I thought this was a lovely little turorial:
*Zokin are different from fukin ( -be careful how you say that one), which are cloths for clean tasks, such as wiping up dishes etc.


Love this! I already knit dishcloths and cleaning cloths, but I can see some recycling happening now!
Although I had admired examples of Japanese stitchery, I had no understanding of its origins and found this fascinating. I love the patched jeans and the practicality of zokin cloths - I am now desperately trying to think about what needs strengthening / mending/ given a little poke!